yeasir007

Thursday, October 18, 2012

Get Direction From Google Map Using Google Map API in asp.net

Get Direction From Google Map Using Google Map API in asp.net

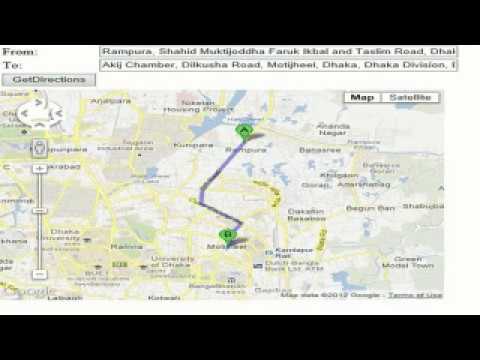
Get Direction From Google Map Using Google Map API in asp.net:

Source code download link : download source code
demo :


.aspx code:


<!DOCTYPE html PUBLIC "-//W3C//DTD XHTML 1.0 Transitional//EN" "http://www.w3.org/TR/xhtml1/DTD/xhtml1-transitional.dtd">
<html xmlns="http://www.w3.org/1999/xhtml">
<head runat="server">
<title></title>
<script type="text/javascript" src="http://maps.googleapis.com/maps/api/js?key=AIzaSyAaczGkYJhz_uP1Xo03sWxYnBB7R1NXzZE&sensor=false&libraries=places&language=eng&types=establishment"></script>

<script language="javascript" type="text/javascript">
function SearchAddressByGoogle(ControlName, e) {//this function will use to get search address from google
var options = {
           // types: ['(cities)'],
          componentRestrictions: { country: "bd" }
};
 var control = document.getElementById(ControlName);
 var autocomplete = new google.maps.places.Autocomplete(control, options);
}

var directionsDisplay;
var directionsService = new google.maps.DirectionsService();
function InitializeMap() {
     directionsDisplay = new google.maps.DirectionsRenderer();
     var latlng = new google.maps.LatLng(17.425503, 78.47497);
     var myOptions = {
            zoom: 13,
            center: latlng,
            mapTypeId: google.maps.MapTypeId.ROADMAP
        };
       var map = new google.maps.Map(document.getElementById("divGoogleMap"), myOptions);

        directionsDisplay.setMap(map);

        var control = document.getElementById('tblControl');
        control.style.display = 'block';
    }

    function calcRoute() {//this function will use to get direction
        var start = document.getElementById('txtAddressFrom').value;
        var end = document.getElementById('txtAddressTo').value;
        var request = {
            origin: start,
            destination: end,
            travelMode: google.maps.DirectionsTravelMode.DRIVING
        };
        directionsService.route(request, function (response, status) {
            if (status == google.maps.DirectionsStatus.OK) {
                directionsDisplay.setDirections(response);
            }
        });
    }

    function btnDirections_onclick() {
        calcRoute();
    }

    window.onload = InitializeMap;//Load defult map
</script>
<style type="text/css">
    .textBox {
        width: 390px;
        overflow: auto;
    }
</style>
</head>
<body>
<form id="form1" runat="server">
<div>
  <table id="tblControl">
  <tr>
     <td>
       <table>
         <tr>
         <td>From:</td>
         <td><asp:TextBox ID="txtAddressFrom" runat="server" CssClass="textBox"></asp:TextBox></td>
         </tr>
         <tr>
            <td>To:</td>
            <td><asp:TextBox ID="txtAddressTo" runat="server" CssClass="textBox"></asp:TextBox></td>
          </tr>
          <tr>
            <td align="right">
            <input id="btnDirections" type="button" value="GetDirections" onclick="return btnDirections_onclick()" />
            </td>
          </tr>
       </table>
      </td>
     </tr>
     <tr>
      <td valign="top">
       <div id="divGoogleMap" style="height: 390px; width: 489px">
       </div>
      </td>
     </tr>
   </table>
 </div>
</form>
</body>
</html>


.cs code:

protected void(object sender, EventArgs e)
{
    if (!IsPostBack)
    {
        txtAddressFrom.Attributes.Add("onkeyUp", "SearchAddressByGoogle('" + txtAddressFrom.ClientID + "',event);");
        txtAddressTo.Attributes.Add("onkeyUp", "SearchAddressByGoogle('" + txtAddressTo.ClientID + "',event);");
    }
} 


Monday, October 15, 2012

Bind data coming from dataset to header in rdlc reports

Bind data coming from dataset to header in rdlc reports

Bind data coming from dataset to header in rdlc reports:


First Create Parameter in rdlc report:

Now Add Parameter from .cs file:
// Add Parameter 
            List<ReportParameter> parameters = new List<ReportParameter>();
            parameters.Add(new ReportParameter("AccountName", accountName));
            parameters.Add(new ReportParameter("AccountCode", "Account Code: " + accountCode));
            parameters.Add(new ReportParameter("UnitName", unitName.ToUpper()));
            parameters.Add(new ReportParameter("UnitAddress", unitAddress.ToUpper()));
            parameters.Add(new ReportParameter("Title", "Schedule"));
            parameters.Add(new ReportParameter("Date", dateVal));
            ReportViewer1.LocalReport.SetParameters(parameters);
            ReportViewer1.ShowParameterPrompts = false;
            ReportViewer1.ShowPromptAreaButton = false;
            ReportViewer1.LocalReport.Refresh();
Note : Para meter name both rdlc and .cs file must be same

How to show headers in each page of the report in Microsoft Report Viewer

How to show headers in each page of the report in Microsoft Report Viewer


How to show headers in each page of the report in Microsoft Report Viewer

In your .rdlc report there is small down arrow at the bottom right corner with red box, you need to click on “Advanced Mode”.


By clicking, your row and column groups will expand with new fields named “Static” as shown below: 

Now, click “Static” in Row Groups list, and check the properties on the right side: Set “RepeatOnNewPage” to “True” and “KeepWithGroup” to “After” as shown below:

Now, repeat above procedure for all “Static” rows in Row Groups list, except the “Static” rows present under the different group (encircled with black color in following figure), do same for the Details group (encircled with red color): 

This enables you to view Header Row on each page of .rdlc report.

Microsoft Report (RDLC) Report Design For Beginner

Microsoft Report (RDLC) Report Design For Beginner

Microsoft Report (RDLC) Report Design For Beginner:

  • Creating the Client Report Definition file (RDLC) Add a folder called “RDLC”. This will hold our RDLC report.

  •  Right click on the RDLC folder, select “Add new item..” and add an “RDLC” name of “Products”. We will use the “Report Wizard” to walk us through the steps of creating the RDLC 
         
  • In the next dialog, give the dataset a name called “ProductDataSet”. Change the data source to “NorthwindReports.DAL” and select “ProductRepository(GetProductsProjected)”. The “Data Source” may show up empty. To get it populated, make sure your project is compiled and there is an index.aspx file in the root folder. This may be a bug.The fields that are returned from the method are shown on the right. Click next.

  
  • Drag and drop the ProductName, CategoryName, UnitPrice and Discontinued into the Values container. Note that you can create much more complex grouping using this UI. Click Next.

  • Most of the selections on this screen are grayed out because we did not choose a grouping in the previous screen. Click next.

  •    Choose a style for your report. Click next

  • The report graphic design surface is now visible. Right click on the report and add a page header and    page footer. 

  • With the report design surface active, drag and drop a TextBox from the tool box to the page header. Drag one more textbox to the page header. We will use the text boxes to add some header text as shown in the next figure.

  • You can change the font size and other properties of the textboxes using the formatting tool bar (marked in red). You can also resize the columns by moving your cursor in between columns and dragging.    

  • Adding Expressions
  • Add two more text boxes to the page footer. We will use these to add the time the report was generated and page numbers. Right click on the first textbox in the page footer and select “Expression”.  

  • Add the following expression for the print date (note the = sign at the left of the expression in the dialog   bellow  

  •  "© Northwind Traders " & Format(Now(),"MM/dd/yyyy hh:mm tt") Right click on the second text box and add the following for the page count. Globals.PageNumber & " of " & Globals.TotalPages Formatting the page footer is complete.We are now going to format the “Unit Price” column so it displays the number in currency format. Right click on the [UnitPrice] column (not header) and select “Text Box Properties..”

  • Under “Number”, select “Currency”. Hit OK.

  • Adding a chart
  • With the design surface active, go to the toolbox and drag and drop a chart control. You will need to move the product list table down first to make space for the chart contorl. The document can also be resized by dragging on the corner or at the page header/footer separator.    

  • In the next dialog, pick the first chart type. This can be changed later if needed. Click OK. The chart gets added to the design surface.

  • Click on the blue bars in the chart (not legend). This will bring up drop locations for dropping the fields. Drag and drop the UnitPrice and CategoryName into the top (y axis) and bottom (x axis) as shown below. This will give us the total unit prices for a given category. That is the best I could come up with as far as what report to render, sorry :-) Delete the legend area to get more screen estate.

  • Resize the chart to your liking. Change the header, x axis and y axis text by double clicking on those areas.

  • We made it this far. Let’s impress the client by adding a gradient to the bar graph :-) Right click on the blue bar and select “Series properties”.

  • Under “Fill”, add a color and secondary color and select the Gradient style.


We are done designing our report. Now you will see how to add the report to the report viewer control, bind to the data and make it refresh when the filter criteria are changed.

      string path = HttpContext.Current.Server.MapPath(your report path);
      ReportViewer1.Reset(); //important
      ReportViewer1.ProcessingMode = ProcessingMode.Local;
      ReportViewer1.LocalReport.EnableHyperlinks = true;

      LocalReport objReport = ReportViewer1.LocalReport;
      objReport.DataSources.Clear();
      objReport.ReportPath = path;

      // Add Parameter if you need
      List<ReportParameter> parameters = new List<ReportParameter>();
      parameters.Add(new ReportParameter("parameterName", ParameterValue));
      ReportViewer1.LocalReport.SetParameters(parameters);
      ReportViewer1.ShowParameterPrompts = false;
      ReportViewer1.ShowPromptAreaButton = false;
      ReportViewer1.LocalReport.Refresh();

      //Add Datasourdce
      ReportDataSource reportDataSource = new ReportDataSource();
      reportDataSource.Name = "odsReportData";
      reportDataSource.Value = YourReportDataSourseValue;
      objReport.DataSources.Add(reportDataSource);
      objReport.Refresh();

For Common rdlc expression follow this link : Common Expressions for ReportViewer Reports